antijam
CCCUK Member
Having recently searched widely for a chrome bumper manual C3 convertible - my first 'Vette - my final choice had two particular attractions - a low (claimed ) mileage and a minimal number of previous owners. The plus side of this was that the car was unlikely to have suffered much 'restoration' from the hands of 'bodgers'; the downside was that nearly 50 years would certainly have taken their toll and the car could well have 'issues' needing attention. So it turned out, though to be fair the general condition of my '71 was very good.....

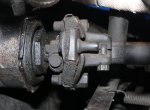
One immediately apparent shortcoming was steering that could best be described as 'imprecise'. A web search revealed this to be an almost universal problem, so I started checking through the system. Straight away the state of the steering coupling or 'rag joint' left something to be desired....

The rubber torus was quite distorted and degraded. It looked as if a previous owner had moved the coupling flange on the steering column down to reduce the clearance available between the flange and the drive pins on the lower part of the joint in an attempt to reduce the steering free play.
Corvette KIngdom recommended and supplied a repair kit. This contained as well as a new rubber, an interesting collection of screws, washers, nuts and pins that bore little resemblance to those in my joint. I suspect the kit is a generic item to overhaul the joint in many american cars of the era.
Anyway, to remove the joint I had the choice of withdrawing the steering column or swinging the steering box clear. I chose the former, which made removal very easy but hindsight after trying to refit it suggested this may not have been the best choice.
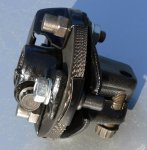
However, stripped, the joint down, cleaned and painted the parts and rebuilt using a combination of new parts in the kit and the original shouldered bolts in place of the kit replacements that were straight hex head screws.

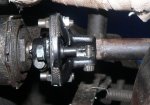
Back in the car and it certainly looks better. The rubber is no longer distorted as the column flange has been moved further up the splines on the column.

I'd love to report that the steering is now play free and pin sharp, but that isn't quite the case. Certainly a lot of the play has gone and travelling at speed is no longer a 'white knuckle, brown corduroy' ride. There is still enough play to remind me that this is certainly not an R&P car, but at least it's a start. Now to start checking steering joints and box adjustment.
One unfortunate side effect of my work was that I found I could no longer remove the ignition key from the lock. After a lot of head scratching I remembered that the reverse gear interlock preventing selection of the key 'lock' position had never worked,. It turned out a previous owner had disconnected the interlock cable and while refitting the column I had moved the lever arm to the lock position. Pulling the arm up again sorted that problem.
There's still quite a list of things to sort - I must replace that tatty soft top - however, sufficient unto the day.....

One immediately apparent shortcoming was steering that could best be described as 'imprecise'. A web search revealed this to be an almost universal problem, so I started checking through the system. Straight away the state of the steering coupling or 'rag joint' left something to be desired....

The rubber torus was quite distorted and degraded. It looked as if a previous owner had moved the coupling flange on the steering column down to reduce the clearance available between the flange and the drive pins on the lower part of the joint in an attempt to reduce the steering free play.
Corvette KIngdom recommended and supplied a repair kit. This contained as well as a new rubber, an interesting collection of screws, washers, nuts and pins that bore little resemblance to those in my joint. I suspect the kit is a generic item to overhaul the joint in many american cars of the era.
Anyway, to remove the joint I had the choice of withdrawing the steering column or swinging the steering box clear. I chose the former, which made removal very easy but hindsight after trying to refit it suggested this may not have been the best choice.
However, stripped, the joint down, cleaned and painted the parts and rebuilt using a combination of new parts in the kit and the original shouldered bolts in place of the kit replacements that were straight hex head screws.

Back in the car and it certainly looks better. The rubber is no longer distorted as the column flange has been moved further up the splines on the column.

I'd love to report that the steering is now play free and pin sharp, but that isn't quite the case. Certainly a lot of the play has gone and travelling at speed is no longer a 'white knuckle, brown corduroy' ride. There is still enough play to remind me that this is certainly not an R&P car, but at least it's a start. Now to start checking steering joints and box adjustment.
One unfortunate side effect of my work was that I found I could no longer remove the ignition key from the lock. After a lot of head scratching I remembered that the reverse gear interlock preventing selection of the key 'lock' position had never worked,. It turned out a previous owner had disconnected the interlock cable and while refitting the column I had moved the lever arm to the lock position. Pulling the arm up again sorted that problem.
There's still quite a list of things to sort - I must replace that tatty soft top - however, sufficient unto the day.....
