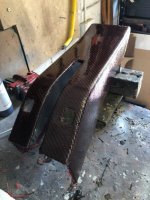
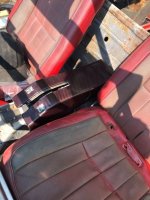
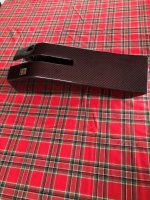
Some of you might remember that I posted an article on the carbon fibre skinning of a damaged and faded C3 armrest. Although I was quite pleased with my first attempt it wasn't technically good enough to go in the car (although it didn't look bad) and I also thought that the black carbon fibre look would be a bit stark and out of place in the sunglasses-at-the-ready bright red cockpit of my project '72. I think carbon fibre trim looks quite good in the multi shades of grey interiors that most modern cars seem to be built with today but I not sure about the suitability for my car. So having got here (see below) with a full carbon fibre skin (not wrap) I decided to do something a bit different to soften the contrast.
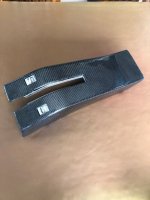
So I selected a mixed red and black carbon fibre weave as a second try.... The black fibre is genuine carbon fibre structural material with a red non structural fibre included for decoration. After buying this I found out that Aston Martin use a very similar red/black fabric for their 'Q' series customer cars.
Each application of skinning adds about 1.5mm (perhaps a bit more) to the dimension of the original object so to ensure that the armrest still fitted correctly the old surface had to come off After doing this (wearing a good quality mask, hat, gloves and overalls - carbon fibre particles aren't nice) and coating the armrest with a base coat of black resin it looked like this...
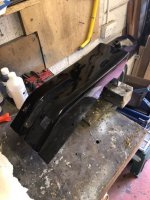
When this resin becomes tacky to the touch the weave is draped over the object and carefully stuck to the resin with the roller (seen in pic). It's very important to get the air bubbles out and to make sure that the weave has fully stuck down. The weave is very fragile in it's uncured state and needs no excuse to start unravelling. One thing I did find with the the two tone weave is that ANY distortion of the fabric is much more noticeable - human eyes are very good at spotting things that aren't quite parallel.
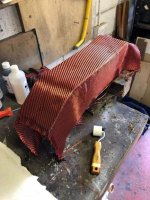
Once the resin is fully cured the excess is trimmed and the holes and grooves are cut out.
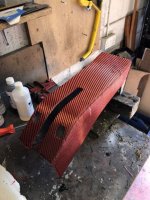
Then two coats or clear resin are added and left to cure fully. It's then rubbed down with 400 grit to make the surfaces as flat as possible and also to give a key for the next resin coat. In the following pic I have used masking tape to 'dam' the resin to give a square edge to the switch holes and to the groove for the brake handle. I added 4 thin coats of clear resin making sure that each new coat was added just as the previous coat was getting tacky - to give a good bond - and also being careful to avoid runs in the vertical surfaces.
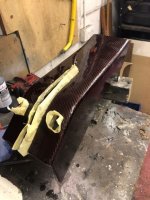
After a little sanding and polishing the armrest came out quite well - a lot better technically than my first attempt - although still not perfect.
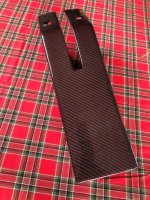
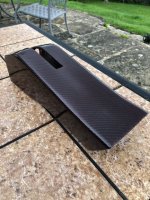
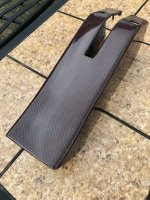
Note that the finished red colour is a lot more subdued than the original (quite shrill) red in the weave.
So ... will I use the armrest? Probably not - I think I still will prefer the original GM finish but it's been good fun experimenting. I will put it to one side and try it out when the interior is complete. If it does look good I will remove any remaining imperfections (there are a few that will sand/polish out) and probably do some of the other damaged interior panels to match.

So I selected a mixed red and black carbon fibre weave as a second try.... The black fibre is genuine carbon fibre structural material with a red non structural fibre included for decoration. After buying this I found out that Aston Martin use a very similar red/black fabric for their 'Q' series customer cars.
Each application of skinning adds about 1.5mm (perhaps a bit more) to the dimension of the original object so to ensure that the armrest still fitted correctly the old surface had to come off After doing this (wearing a good quality mask, hat, gloves and overalls - carbon fibre particles aren't nice) and coating the armrest with a base coat of black resin it looked like this...

When this resin becomes tacky to the touch the weave is draped over the object and carefully stuck to the resin with the roller (seen in pic). It's very important to get the air bubbles out and to make sure that the weave has fully stuck down. The weave is very fragile in it's uncured state and needs no excuse to start unravelling. One thing I did find with the the two tone weave is that ANY distortion of the fabric is much more noticeable - human eyes are very good at spotting things that aren't quite parallel.

Once the resin is fully cured the excess is trimmed and the holes and grooves are cut out.

Then two coats or clear resin are added and left to cure fully. It's then rubbed down with 400 grit to make the surfaces as flat as possible and also to give a key for the next resin coat. In the following pic I have used masking tape to 'dam' the resin to give a square edge to the switch holes and to the groove for the brake handle. I added 4 thin coats of clear resin making sure that each new coat was added just as the previous coat was getting tacky - to give a good bond - and also being careful to avoid runs in the vertical surfaces.

After a little sanding and polishing the armrest came out quite well - a lot better technically than my first attempt - although still not perfect.


Note that the finished red colour is a lot more subdued than the original (quite shrill) red in the weave.
So ... will I use the armrest? Probably not - I think I still will prefer the original GM finish but it's been good fun experimenting. I will put it to one side and try it out when the interior is complete. If it does look good I will remove any remaining imperfections (there are a few that will sand/polish out) and probably do some of the other damaged interior panels to match.

