Vetman
CCCUK Member
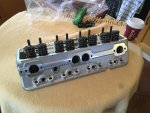
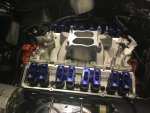
When I retired a few years ago I treated myself to some tuning parts including alloy 64cc heads, air gap manifold, roller rockers, and some dress up parts. The car already had a mild performance camshaft upgrade. These new parts sat under my study desk for a couple of years until I summoned up the courage to pull down my perfectly running engine in order to fit them.
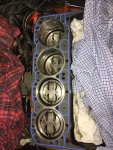
I invested in a Leakdown Tester to test cylinder leakage once the new heads were fitted. One cylinder leaked on the new head exhaust valve. I spoke to Edelbrock and was told that this would bed in and stop leaking.
I watched many YouTube videos including many on valve lash adjustment. I went through the process one cylinder at a time using the method of rotating the pushrod between finger and thumb while tightening the rocker nut until friction was felt. I then the applied a recommended amount of extra tightening. This advice varied between 1/4 and 3/4 of a turn. I used 1/2 turn. I completed all cylinders but decided to repeat the leakdown test. I found a number of the cylinders were now leaking on the valves. I concluded that my valve lash adjustment had lifted some of the valves off their seat.
I repeated the operation but this time I tightened the nuts while checking up and down pushrod slack. I then used a 1/4 turn extra tightening. I repeated the leakdown test and now all cylinders, apart from the existing exhaust valve leak, were sealed.
Later, after running the car for say 100 miles, I repeated the leakdown test on the dodgy cylinder and it no longer leaked on the exhaust valve.
My experience suggests that valve lash adjustment is a very sensitive operation.