72 Corvette - Restoration Updates

TimP

CCCUK Member
I personally don’t mind the license plate bolts/screws/fixings showing on the plate. With chrome caps on the fixings it will contrast well against the black plate and compliment the chrome rear bumpers.

Keep up the great work.
Hadn't thought about chrome caps - had imagined using black fittings that would have gone over the silver letters/numbers that would have drawn the eye. Sometimes I just get distracted by an idea that has a disproportionate amount of effort for the benefit it gives.

Thanks!
 

TimP

CCCUK Member
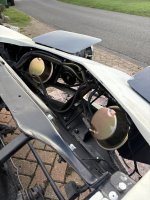
So having taken everything apart that related to the headlamp pods, and then putting everything back together and set up in the right order..... it alls seemed to fit quite nicely. I am baffled - don't what was wrong the first time - but I'm not going to argue with it.
Final Assy 24.jpg
I also installed all the front lights wiring reasonably tidily and tucked everything away using p-clips so that the hood can open unobstructed.... Tested the lights and they all work fine.

Final Assy 23.jpg

Having got that (finally) sorted out I thought it was time to start the engine.... so after a few preliminary checks everything seemed to look ok.

Last Thursday afternoon with the first try of the ignition key, the engine turned over nicely on the starter but no firing....Then I noticed that the oil pressure gauge pipe was pumping oil on to the drive so that stopped play until it was properly hooked up....

Checked everything out on Friday... Found one loose spark plug and a vacuum pipe disconnected. A further 30 mins of trying to start the engine produced a few odd bangs and a dead battery...

Spoke to a few of the club members on Saturday night and the general consensus was that ignition timing was likely to be the culprit.

Spent an hour on Monday morning redoing the timing and it was way out... Got it all sorted properly, set up a camera and .......

'72 Corvette first start

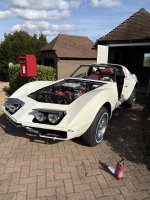
As far as I know this is the first time the engine has run since 1993 when it was laid up. There are no mufflers, radiator, cooling fan fitted at the moment and the engine wiring/hoses/pipes all need to be tidied up and routed in the right place but.... the engine sounded smooth and settled down to a steady fast idle, admittedly for a short time until I killed the ignition. Didn't want to melt any wires on the manifolds so kept it short this time.
Final Assy 25.jpg
I wasn't expecting it to run so smoothly at all, in fact I bought a fire extinguisher just in case..... Thought it might have run rough at first until the carb and timing were spot on but it seems remarkably smooth first time out.

Beautiful sunny day (hence silly hat) and a major milestone - got to say I am pretty chuffed.

Next step is to get the engine bay fully sorted out and all missing pieces attached in their rightful positions, then do some more testing....
 

rubyragtop

Committee Member
A great achievement Tim and another step towards to completion. You are a true inspiration to others to tackle jobs on their Vettes.
Please don't forget to write up another article for the magazine, especially for the benefit of those who don't sign on to this site and new members who are not aware of the mammoth task that you have undertaken.
 

Mad4slalom

Well-known user
So having taken everything apart that related to the headlamp pods, and then putting everything back together and set up in the right order..... it alls seemed to fit quite nicely. I am baffled - don't what was wrong the first time - but I'm not going to argue with it.
View attachment 31718
I also installed all the front lights wiring reasonably tidily and tucked everything away using p-clips so that the hood can open unobstructed.... Tested the lights and they all work fine.

View attachment 31717

Having got that (finally) sorted out I thought it was time to start the engine.... so after a few preliminary checks everything seemed to look ok.

Last Thursday afternoon with the first try of the ignition key, the engine turned over nicely on the starter but no firing....Then I noticed that the oil pressure gauge pipe was pumping oil on to the drive so that stopped play until it was properly hooked up....

Checked everything out on Friday... Found one loose spark plug and a vacuum pipe disconnected. A further 30 mins of trying to start the engine produced a few odd bangs and a dead battery...

Spoke to a few of the club members on Saturday night and the general consensus was that ignition timing was likely to be the culprit.

Spent an hour on Monday morning redoing the timing and it was way out... Got it all sorted properly, set up a camera and .......

'72 Corvette first start

As far as I know this is the first time the engine has run since 1993 when it was laid up. There are no mufflers, radiator, cooling fan fitted at the moment and the engine wiring/hoses/pipes all need to be tidied up and routed in the right place but.... the engine sounded smooth and settled down to a steady fast idle, admittedly for a short time until I killed the ignition. Didn't want to melt any wires on the manifolds so kept it short this time.
View attachment 31719
I wasn't expecting it to run so smoothly at all, in fact I bought a fire extinguisher just in case..... Thought it might have run rough at first until the carb and timing were spot on but it seems remarkably smooth first time out.

Beautiful sunny day (hence silly hat) and a major milestone - got to say I am pretty chuffed.

Next step is to get the engine bay fully sorted out and all missing pieces attached in their rightful positions, then do some more testing....
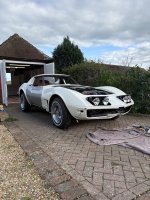
Great news Tim!😁👏 what a milestone you have reached. I bet the oil pressure line gave you a shock !, is yours still a copper line? I had a leak (minor) at the block end which I struggled to seal with new olive. I found “extra” pipe coiled up behind left lower dash so pulled some more through and re made connection with another new olive. A friend suggested sealey , air and brake pipe sealant which seems to have cure it. I think half the problem was the new brass fittings which felt squeaky dry when tightening, he suggested lightly greasing the thread after putting the sealant on the olive and pipe And this allowed for more “feel”when tightening the pipe fitting. I have Two of the plastic oil line to gauge kits here if you want to go that route , you are more than welcome to one , let me know snd I will pop it in the post. 👍
Great to see your progress Tim, Brilliant 👍
 
Top