You are using an out of date browser. It may not display this or other websites correctly.
You should upgrade or use an alternative browser.
You should upgrade or use an alternative browser.
72 Corvette - Restoration Updates
- Thread starter TimP
- Start date
Many thanks for all the positive comments. To answer your questions...
Roscobbc: The selector arms are a nice snug fit on the shafts - there isn't any play there and all 3 seem to fit well. Again I think I have been lucky here. Since posting this morning the only negative thing I have found with the gearbox is quite a lot of wear on the outside of the output shaft where it is supported by the tail shaft bushing - I shall investigate further tomorrow but this may have to be replaced.
Johng: The little black plastic tab in the middle fell out as I dismantled the switch but I cannot see where it came from. This tab clearly has a fracture on one end but I cannot see (and I looked quite hard) where it can have come from. I have kept it just in case. The switch does seem to work ok so I am little mystified. Maybe it is not related at all. Any thoughts? - I know you stripped yours too.
johng
CCCUK Member
I wondered if it might have broken off from somewhere, as I had a bit of plastic loose in my switch when I opened it up. The vacuum part of my switch had seized and someone had forced it and broken off the bit of plastic. You can see in this photo where I stuck it back on.
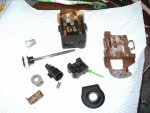
This photo is not properly in focus but you can just see the thin bit of steel I glued on the back to reinforce the repair. It hasn't broken yet!
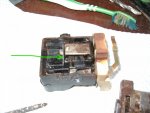

This photo is not properly in focus but you can just see the thin bit of steel I glued on the back to reinforce the repair. It hasn't broken yet!

Oneball
CCCUK Member
That's interesting with your central gauge pod - my 68 doesn't have central vents just below the wiper switch. Its just blank metal. Were the vents a "later years" thing, or an optional extra?
if you look under the bit with the Corvette script there’s a hole that’s your vent.
Dazaa
Well-known user
That's interesting with your central gauge pod - my 68 doesn't have central vents just below the wiper switch. Its just blank metal. Were the vents a "later years" thing, or an optional extra?
I don't know if 68's had a one year only thing, but the centre vents were for AC cars, non AC had the metal plate with the corvette script.
CaptainK
Administrator
Ahhh... that sounds like mine then as mine doesn't have AC. I was just gonna assume it was a 1968 only thing again.I don't know if 68's had a one year only thing, but the centre vents were for AC cars, non AC had the metal plate with the corvette script.
Oneball
CCCUK Member
Not an expert but just having a look on various suppliers websites there seems to be a 68 only center gauge pod, then a few differences in the 69 to 71 pod and then further changes for 72. One of the more obvious changes going from 68 to 69 seems to be (but I stand to be corrected) that the 68 surface finish was smooth and the 69 onwards pods finish was textured. It's also possible that the warning lights on the right hand side changed but I'm not sure.
CaptainK
Administrator
Blimey, you've got a full tank :OThere is a vent on the non AC cars. Look under the bit with the Corvette script on it.
View attachment 8460
Roscobbc
Moderator
Even though l have owned my '68 for 20 years now (and thought I knew most of the differences and 'quirks' for the first year) it's nice to know there are no doubt plenty more to find.Not an expert but just having a look on various suppliers websites there seems to be a 68 only center gauge pod, then a few differences in the 69 to 71 pod and then further changes for 72. One of the more obvious changes going from 68 to 69 seems to be (but I stand to be corrected) that the 68 surface finish was smooth and the 69 onwards pods finish was textured. It's also possible that the warning lights on the right hand side changed but I'm not sure.
Evening All! It's been a week of mixed fortunes as far as the rebuild is concerned. I'm still tinkering with the vacuum system - something still isn't quite right. A set of golf tees that I can't remember why I have - I don't play golf - are very effective at blocking off individual sections of the circuit to help isolate problems. Hopefully I can get this sorted soon.
Not being someone to do one thing at a time I decided to rebuild the heater box - it's been taking up a fair bit of floor space and once rebuilt can be boxed up and stored somewhere until next required. The heater core is scrap, something I had suspected as it has been bypassed by the previous owner. A new one has been ordered but I have put the old one back in until that arrives to keep everything in order.
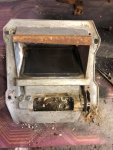
The heater cable (from the control unit to the heater box) has also seized and unfortunately snapped (due to corrosion) when I tried to free it up. I will try and repair this if possible otherwise a new one will be required. Amazingly, the vacuum actuator still works. The mechanism operates a lot more smoothly now that it has been cleaned and lubricated.
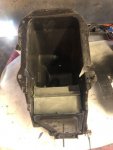
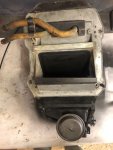
The rubber valves/vanes were treated with a rubber lubricant made for window seals which hopefully will keep them supple for another few years - they certainly look and feel a lot better for it.
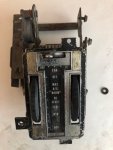
The control unit has been cleaned, lubricated and the electrical contacts have been polished. I will paint the lens surround black sometime next week if the weather warms up a bit. A new lens is probably required but stripping it may well turn out to be a one way street as it's quite complicated and the design seems to rely on bending a metal tab to get the lens out - I never seem to get on well with those and they are quite expensive if the tab snaps off. It feels much better with a little grease on the moving parts so I will probably leave it as it is.
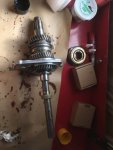
The main problem for this week was the gearbox. Removal of the tail shaft to replace the bush and seal requires a small tapered pin to be knocked out of the reverse selector lever turret. Apparently these are notoriously difficult to remove and this one is no exception. I tried everything but decided to bale out before I broke something or the pin became unrecognisable - I think it will require drilling out and needs a precision I don't think I can do at home. The tail shaft is very worn on the outside (hence the desire to inspect and replace the bushing) although there is no play in the spline. This doesn't seem to make sense to me and may indicate some other issue. Anyhow I have decided that this diagnosis and repair needs to be done by someone who knows what they are doing so it will taken to a local professional in the New Year.
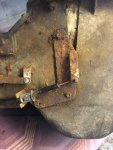
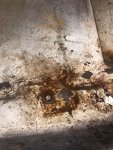
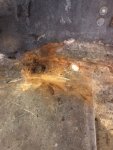
Lastly, I removed the drivers seat reinforcement plate from the underside of the floor pan by drilling out the 4 rivets that hold it in place. When I removed the seat one bolt had already corroded through and one had to be sawn off (see pics) - a common situation with my car. It was going to be a lot easier to remove these broken bolts on the bench especially as the remaining stubs had to be filed down to get purchase, heated, squirted with Plus Gas etc. to get them out. Which they did - after a struggle. This plate is now having the rust removed - not a lot of rust actually and it's in remarkably good shape - and will be painted prior to refitting.
Over the next week I am going to try and plan out the next part of the rebuild and sequence the work a little better. One of the things I had underestimated was the amount of space necessary to do a build like this so I need to shuffle things around a bit so that I can keep going...
Not being someone to do one thing at a time I decided to rebuild the heater box - it's been taking up a fair bit of floor space and once rebuilt can be boxed up and stored somewhere until next required. The heater core is scrap, something I had suspected as it has been bypassed by the previous owner. A new one has been ordered but I have put the old one back in until that arrives to keep everything in order.


The heater cable (from the control unit to the heater box) has also seized and unfortunately snapped (due to corrosion) when I tried to free it up. I will try and repair this if possible otherwise a new one will be required. Amazingly, the vacuum actuator still works. The mechanism operates a lot more smoothly now that it has been cleaned and lubricated.


The rubber valves/vanes were treated with a rubber lubricant made for window seals which hopefully will keep them supple for another few years - they certainly look and feel a lot better for it.
The control unit has been cleaned, lubricated and the electrical contacts have been polished. I will paint the lens surround black sometime next week if the weather warms up a bit. A new lens is probably required but stripping it may well turn out to be a one way street as it's quite complicated and the design seems to rely on bending a metal tab to get the lens out - I never seem to get on well with those and they are quite expensive if the tab snaps off. It feels much better with a little grease on the moving parts so I will probably leave it as it is.

The main problem for this week was the gearbox. Removal of the tail shaft to replace the bush and seal requires a small tapered pin to be knocked out of the reverse selector lever turret. Apparently these are notoriously difficult to remove and this one is no exception. I tried everything but decided to bale out before I broke something or the pin became unrecognisable - I think it will require drilling out and needs a precision I don't think I can do at home. The tail shaft is very worn on the outside (hence the desire to inspect and replace the bushing) although there is no play in the spline. This doesn't seem to make sense to me and may indicate some other issue. Anyhow I have decided that this diagnosis and repair needs to be done by someone who knows what they are doing so it will taken to a local professional in the New Year.
Lastly, I removed the drivers seat reinforcement plate from the underside of the floor pan by drilling out the 4 rivets that hold it in place. When I removed the seat one bolt had already corroded through and one had to be sawn off (see pics) - a common situation with my car. It was going to be a lot easier to remove these broken bolts on the bench especially as the remaining stubs had to be filed down to get purchase, heated, squirted with Plus Gas etc. to get them out. Which they did - after a struggle. This plate is now having the rust removed - not a lot of rust actually and it's in remarkably good shape - and will be painted prior to refitting.


Over the next week I am going to try and plan out the next part of the rebuild and sequence the work a little better. One of the things I had underestimated was the amount of space necessary to do a build like this so I need to shuffle things around a bit so that I can keep going...
johng
CCCUK Member
It is amazing how much space you need to store a car once you take it apart. I managed to fill most of the entire upstairs and downstairs of my double garage. Glad to see you've been hard at it, the other Tim has either slowed right down or is just keeping us waiting before he shows us what colour he has painted his car 
Oneball
CCCUK Member
It is amazing how much space you need to store a car once you take it apart. I managed to fill most of the entire upstairs and downstairs of my double garage. Glad to see you've been hard at it, the other Tim has either slowed right down or is just keeping us waiting before he shows us what colour he has painted his car
My conservatory is full too. To be honest it’s not much use as it’s too hot in summer and too cold in winter. There also a seat and headlights in the guest bedroom!
I’m still sanding stuff
Plus I don’t think I’m allowed in the garage for the next two weeks.
PS I’ve given you a clue on the colour.


