You are using an out of date browser. It may not display this or other websites correctly.
You should upgrade or use an alternative browser.
You should upgrade or use an alternative browser.
C3 Race Car Build
- Thread starter Oneball
- Start date
Nick B
CCCUK Member
Nice job!Corner of the windscreen frame now done. You can’t get the correct shaped part so I’ve had to modify the 73 on panel to fit correctly with a few sheets of plate to build up the shape.
View attachment 4444
View attachment 4445
View attachment 4446
View attachment 4448


Oneball
CCCUK Member
What are your number 2 mounts like? With the amount of rust you had in the windscreen frame, I'm surprised they are not rusty too (mine were).
They’re ok. Had to do a repair between the 1 and 2 mounts. But the no 2 mounts only had very light surface rust but have cleaned up fine. I think the windscreen rust was because 20 years ago the header rail was leaking into the car someone bodged a seal and trapped water in the windscreen frame.

Oneball
CCCUK Member
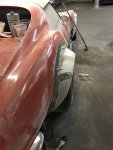
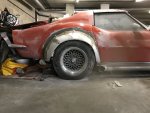
Trying to get all the messy stuff done I’ve started investigating the previous repairs to the crash damage on the rear quarter. The paint was cracked so I knew there was some dodgy filler work, low and behold half a ton of bondo smoothered what were cracks but then seem to have been angle ground out, presumably so they could get more filler in there. Utter cockblock and I’ve not even got to the actual rear end yet.


Oneball
CCCUK Member
The paint is relatively easy to remove as it’s not really stuck to the primer, just a razor blade and a bit of heat. Some thinners then get the primer off.
I’m using a lot more heat and a meaty scraper to remove the filler. Most fillers go quite soft with heat, the bits where the filler is over paint just peels off in sheets.
I’m using a lot more heat and a meaty scraper to remove the filler. Most fillers go quite soft with heat, the bits where the filler is over paint just peels off in sheets.
Last edited:


Dazaa
Well-known user
You have no idea how lucky you are that you got a decent set of flares. I'm in the process of glassing mine now and both passenger side had to be cut in 3 places to get the shape right, I think they had been removed from the mould before the epoxy was fully set so the shapes were terrible.
Oneball
CCCUK Member
You have no idea how lucky you are that you got a decent set of flares. I'm in the process of glassing mine now and both passenger side had to be cut in 3 places to get the shape right, I think they had been removed from the mould before the epoxy was fully set so the shapes were terrible.
The other thing that might be affecting you is the L88 flares are designed for the 68-69 cars.
They changed the shape of the lower portion of the wings in 1970 to stop stone chipping.
oldmemberl68
CCCUK Member
Good luck with your project brave man . Ive enjoyed following your progress and look forward to further installments and seeing the finish car
Dazaa
Well-known user
The other thing that might be affecting you is the L88 flares are designed for the 68-69 cars.
They changed the shape of the lower portion of the wings in 1970 to stop stone chipping.
Sadly cutting the bottom of the wings was the easy part. Driver side fitted nicely, passenger side were both about 4 inches too long so bending them in to shape caused the top to flex outwards so there was a 1inch" between the arch and the tire (other side is less than 1/4") so it looked terrible. Got there in the end after cutting it in to three pieces.