72 Corvette - Restoration Updates

TimP

CCCUK Member
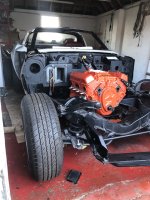
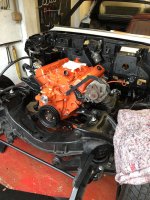
Like most of the country the weather down south last week wasn't too conducive to grubbing around on my driveway but finally on Thursday we had blue skies. Although cold (sub zero actually), the idea of putting the engine back in the frame was on...

... and here it is. Da naaaaa....
Engine Bay 9.jpg

It seemed to go in quite easily although I did manage to catch some of the fresh Chevy Orange in the process so a little touch up will be required, but nothing serious.

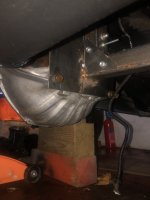
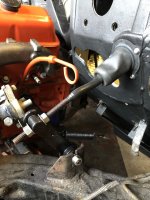
However, those familiar with this part of a rebuild will know that , in an ideal world, the gearbox should be attached to the engine. when refitting it So with my gearbox still being overhauled it needed to go back in without it. So what's the problem? The engine mounts on an SBC are very close to the front of the engine so when the engine is installed it wants to tip back and although I didn't try it, it would probably distort the mounts quite seriously and end up with the engine crashing through the firewall - not good. Temporarily we (I borrowed a hoist from a friend who kindly joined in with the installation) put some support at the rear in place - some wooden blocks - but as this rendered the car immobile, I created a fixture to act as the gearbox. It's very rough and crude but does the job.... The front part is bolted on to the bell housing and the rear of the box section tube rests on the gearbox cross member further down the chassis, thereby supporting the engine - probably not quite at the correct angle but close enough for the time being.
Engine Bay 8.jpg
When the gearbox returns - allegedly quite soon - I should be ready (early Feb) to lift the body and fit it, as GM intended, in the correct place with a new mount

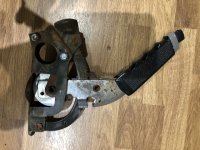
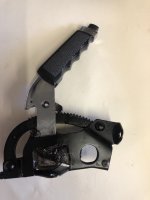
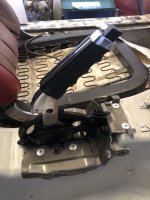
In a moment of distraction to the main event I refurbished the handbrake which came up much better than expected. Steel wool on the chrome and a fairly good clean, rub down and paint on the frame. Once greased it was installed...
Interior-17.jpg

Interior-18.jpg
Interior-19.jpg

This week I will continue with adding bits on to the engine, finishing and installing the power window wiring loom and if time permits, a bit more insulation and sound proofing on the driver's side. Still lots to do but it's starting to look a bit more like a car again.
 

johng

CCCUK Member
Tim, the chrome on my handbrake was very similar to your first photo. I cleaned it up with some metal polish but it hasn't come up anywhere near as good as yours. I was scared of getting to aggressive ( using wire wool like you) as I thought it would just flake off the plating. Looks like I should give it a go.
 

TimP

CCCUK Member
Tim, the chrome on my handbrake was very similar to your first photo. I cleaned it up with some metal polish but it hasn't come up anywhere near as good as yours. I was scared of getting to aggressive ( using wire wool like you) as I thought it would just flake off the plating. Looks like I should give it a go.
I read somewhere that steel wool should work on bad chrome but I tried a piece of the chrome which would be out of sight when the handbrake cover is on First. I would recommend doing the same. I was quite gentle with it and one bad patch is still visible. If you do a search on YouTube for β€œsteel wool chrome” you will see quite a few videos on this - probably where I first saw it, come to think of it. Good luck!
 

Mad4slalom

CCCUK Member
Tim, the chrome on my handbrake was very similar to your first photo. I cleaned it up with some metal polish but it hasn't come up anywhere near as good as yours. I was scared of getting to aggressive ( using wire wool like you) as I thought it would just flake off the plating. Looks like I should give it a go.
[/QUOTE have you tried the screwed up tin foil, good forgetting rid of light rust on chome plated parts . πŸ‘
 

TimP

CCCUK Member
What have you done with your gearbox?
It's with a local transmission specialist for overhaul - a few parts needed to be looked at, notably the output shaft bush which was a little sloppy - and it needed a once over by. an expert. I wanted to 'fit and forget it' so asking someone who knew what they were doing was probably best as gearboxes aren't something I know anything about at all and they are difficult to get out. It is supposed to be returned soon although I must admit it has been with them quite a while already and I have had to chase up regularly so let's see......
 

TimP

CCCUK Member
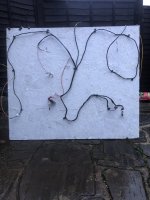
Hope everyone had a good Christmas Day. For obvious reasons its been quiet week on the car front but I did manage to complete the power window wiring loom. All the old tape was removed, the various chewed wires replaced and connectors cleaned or replaced as required. I have added an extra wire for each door so that I can include a red safety light and/or puddle light when the time comes. It was easy to do this whilst all the binding tape was off. The doors are in really bad shape so adding these extra lights in will be relatively straightforward.

Wiring 5.jpg

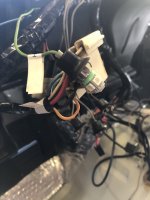
I have also started to mount, clean and prepare the instrument and fuse box wiring loom, which is a bit more complicated. More of the same repair work required just more complex, particularly as the previous owner had modified the wiring (see bottom right of pic) to include an 8 pin Corvette (but made by Pioneer) radio which they had power off not required auto transmission power feed. I will replace this 8-pin, connect it to the right power take off wire and add an 8 pin to ISO convertor (from eBay) which will make it easier to change radios in future if I (or next owner) needs or wants to.
Wiring 6.jpg

Have a good week and Happy New Year!
 

Chuffer

CCCUK regional rep
Hope everyone had a good Christmas Day. For obvious reasons its been quiet week on the car front but I did manage to complete the power window wiring loom. All the old tape was removed, the various chewed wires replaced and connectors cleaned or replaced as required. I have added an extra wire for each door so that I can include a red safety light and/or puddle light when the time comes. It was easy to do this whilst all the binding tape was off. The doors are in really bad shape so adding these extra lights in will be relatively straightforward.

View attachment 20297

I have also started to mount, clean and prepare the instrument and fuse box wiring loom, which is a bit more complicated. More of the same repair work required just more complex, particularly as the previous owner had modified the wiring (see bottom right of pic) to include an 8 pin Corvette (but made by Pioneer) radio which they had power off not required auto transmission power feed. I will replace this 8-pin, connect it to the right power take off wire and add an 8 pin to ISO convertor (from eBay) which will make it easier to change radios in future if I (or next owner) needs or wants to.
View attachment 20298

Have a good week and Happy New Year!
Most people are happy with a game of Snakes and Ladders at Christmas . πŸ˜†
 

TimP

CCCUK Member
It's Sunday so probably time for an update.....

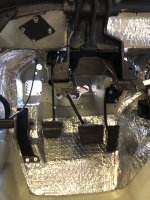
I have progressed with the insulation in the drivers footwell...
Interior-20.jpg

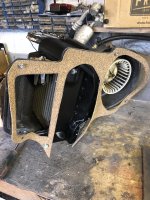
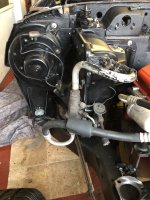
.... and have made a gasket for the air con unit that fits to the firewall - here shown prior to some final trimming of gasket areas which turned out to be unnecessary.. and then fitted (again probably temporarily) the unit in place to check fit. I haven't done much to the air con side of the HVAC - don't know much about what needs to be done other than its going to be expensive as I am pretty sure very little of it works. However, I suspect that the evaporator hidden in the air con box is in good condition I might be lucky there. I'll worry about this later when the car is running.

HVAC 17.jpg HVAC 18.jpg

The engine has had various ancillaries, manifolds and brackets added. The alternator will need to be replaced but I have installed it anyway to help with fitting other parts and to get it out of the way.
Engine Bay 10.jpg

The wiring has been my main focus this week and the instrument harness has now had the binding tape removed and various fixes have taken place - notably in the radio area.Wiring 7.jpg

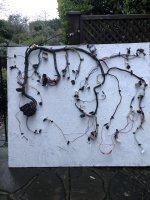
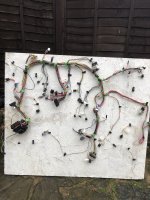
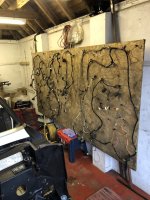
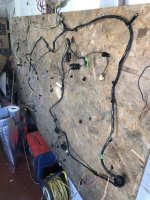
The other three looms have been mounted on a board and a set of parts have been ordered (and which have arrived) so I should be able to get these back in shape relatively quickly.
Wiring 8.jpg

All in all the looms have been in better condition than I had expected and once the dirt and grease was removed there wasn't much damage other than some previous owner 'improvements'.

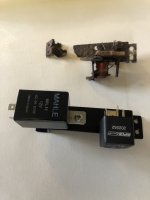
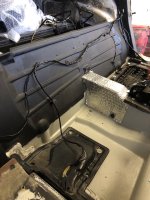
The burglar alarm relay and flasher unit (actually for the separate alarm horn) were badly corroded. On the '72 this sits in the outer compartment behind the passenger seat. A new bracket was made and new electrical units bolted on. I will need to change the connectors on the wiring loom to match but it should be ok. I have used modern units rather than original style. One of my 'improvements' that a subsequent owner can complain about in future years....but I will document what has been done. Yes, really. (road to hell etc.....)
Wiring 9.jpg

Over the next 2 weeks I hope to get the looms completed and ready for re-fitting. Part of this will be cleaning every copper contact and using a little dialectric grease to ensure good electrical connections - that's going to be a pain but it needs to be done. I will also install the switches (brake and clutch) on the pedals and fit the clutch rod and accelerator cable so that the pedal box area is almost ready for .... (steering column, brake booster, instrument gauges? - not sure yet). There is some insulation to glue in at this point and I would like to trial fit the instrument loom soon to make sure that I understand the routing. Testing the loom should be quite interesting and I have been giving this some thought. More next time but I need to choose some bulbs first.....
 

Andrew Gorrod

CCCUK Member
I found when replacing looms on my 68 that I now have features I didn't know I had. Like a key in warning buzzer and foot well lamps. The key-in warning was interesting when testing before powering up and the horn relay kept buzzing because the key was in and the door open. Before the door lamp switches were not connected so I never knew I had the warning!
 

johng

CCCUK Member
Looking good as ever Tim. I ended up replacing everything on my A/C except for the liquid line and it cost me Β£600 in total. I think you might have an earlier system to mine, from what I've read it's probably worth switching to the later system if you need to replace most of it anyway.
 

TimP

CCCUK Member
I found when replacing looms on my 68 that I now have features I didn't know I had. Like a key in warning buzzer and foot well lamps. The key-in warning was interesting when testing before powering up and the horn relay kept buzzing because the key was in and the door open. Before the door lamp switches were not connected so I never knew I had the warning!
Yes indeed! Similarly I hadn't realised that these early C3's had a burglar alarm built in (how many other 70's cars had an alarm?) which is triggered by either the hood or the doors opening although I had wondered why there are two door open sensors on each door and why there is a key lock in the rear panel above the rear bumpers when there is no boot!
 

TimP

CCCUK Member
Looking good as ever Tim. I ended up replacing everything on my A/C except for the liquid line and it cost me Β£600 in total. I think you might have an earlier system to mine, from what I've read it's probably worth switching to the later system if you need to replace most of it anyway.
Thanks! I'm really enjoying this part of the build. I think your suggestion is a good idea - I know that there are conversions kits for modern refrigerants so that's probably the way to go. I haven't even looked at the compressor but I know that the a/c radiator/condenser(?) - the one by the main engine cooling radiator - is damaged so that's going to need to be replaced.
 

TimP

CCCUK Member
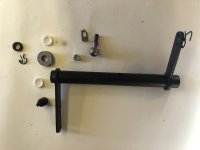
These last two weeks have been a little slow, mainly due to the cold weather, but I have managed to rebuild the Z shaft that is part of the clutch mechanism.
Here is the shaft after cleanup with the new parts to be fitted. The grease that normally sits in it was completely solid and I doubt was providing any lubrication at all.
Engine Bay 11.jpg

Quite a satisfying job to do and it fitted straight in. The engineering is perhaps a little crude but it works really nicely and the action is very smooth without any play. I'll take simple and effective any day. Fitted it looks like this - although the felt seal and the little plastic cap to keep the grease in the shaft are missing at the moment - more items for the snag list. The chassis bracket needs some TLC but once the weather warms up a bit ....
Engine Bay 12.jpg

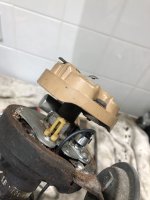
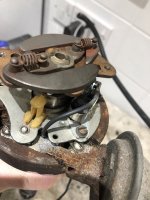
The distributor has been sitting in a box for the last three years but even so it was a little rusty and very dirty.
Engine Bay 13.jpg Engine Bay 14.jpg
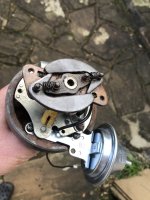
Stripped and with a few new parts it was much improved. The original points and condenser looked new so were kept. BHCC, who sold me the car, said at the time that they had tried (and failed) to start the engine and I think they must have fitted these as part of that effort. The vacuum advance was tested with a vacuum pump and it failed due to a slight leak. The mechanical advance was cleaned, lubricated and refitted. Afterwards it looked like this..
Engine Bay 15.jpg
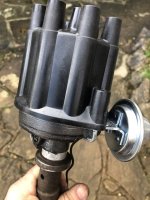
The outside of the distributor shaft was painted with a high temperature paint and then everything was reassembled with the points set to a default gap....
Engine Bay 16.jpg

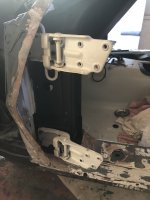
All the hinges were fitted ready for the front clip to be reinstalled - doors will be necessary for alignment and fit.

Body 1.jpg
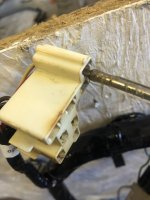
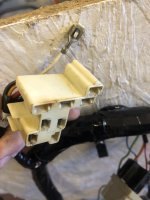
However, most of the time has been taken cleaning the instrument loom contacts. There are probably 60 or 70 contacts that need to be stripped, cleaned, greased and reassembled. Most are of the type that are pushed out by bending a small tang on the top of the contact. I used a modified screwdriver for this...
Electrical 5.jpg Electrical 4.jpg

I used a WD40 contact cleaner as the solvent and a medium grade wet-n-dry paper to clean up the copper. Both together they worked very well. A dielectric grease was applied to try and stop any further corrosion. The tang then needs to be bent out again to catch inside the plastic moulding on refitting. I've got another 5 or 6 contacts to do in the main fuse box next week and then this loom is ready to be refitted. Most of the relays have been tested and amazingly are ok - the only item that doesn't seem to work is the ignition switch buzzer, which will need to be replaced. I have already replaced the radio part of the loom with a set of ISO connectors to make it easy to upgrade the radio. The Corvette (Pioneer made) radio has an eardrum busting 3.2watts per channel at 5%THD. I'm probably not going to be using it much but even so it's going to sound pretty poor compared to a modern set up so it might have to go. I'm assuming that it actually works of course - which is unlikely - but the ISO connectors will make replacement really easy.
Next weeks job is to finish this loom and fit it. Then do the same thing to the engine loom. I also want to hang the doors and trial fit the front clip. The weather is dry for another week so this looks achievable. The bonding adhesive will need a temperature of at least 15C so my plan for getting the front clip fully installed by the end of January was probably a tad optimistic and will have to wait until it gets warmer.
 

TimP

CCCUK Member
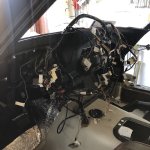
There didn't seem to be much point in posting a whole series of pictures about refurbishing the wiring - it would have been very repetitive - but I am pleased to report that all 5 looms (instrument, engine, forward lights, rear body loom, power windows) are all now done, getting them all completed on an I've started so I will finish basis. A bit tedious but worthwhile in the long run.

The instrument loom is partially in place waiting for the steering column to be installed..... and trialling some LED replacements. Here's a green one for the indicator lamps on the speedo but fitted (somewhat confusingly) in the main beam on idiot light socket, just to see if they fit properly - which they do.
Wiring 11.jpg Wiring 14.jpg
The rear body loom was a bit of a mess when it came out - most of the binding tape was missing and there was a little damage - but this has now been repaired and trial fitted. It seems to go in quite nicely so far. I have added an extra wire for an electric aerial but otherwise it is as GM intended.

Wiring 13.jpgWiring 10.jpg
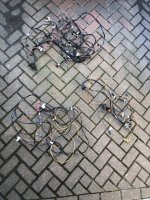
The other looms are waiting to be installed...
Wiring 12.jpg

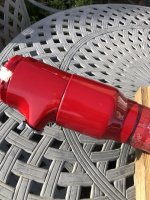
I have started painting the steering column which I would like to fit as part of the instrument wiring installation. I am doing one section at a time which although taking longer is actually easier as it's a bit fiddly painting these parts, particularly the lower two sections where one slides over the other. The original as delivered finish can be seen on the third section at the lower right - pretty rough - but it is coming up quite nicely. The paint colour is Mini Chilli Red which is as close as I can get to the original GM colour and seems to be a good match to the other red parts in the interior. It has the advantage of being easily available from Halfords.
Interior-21.jpg

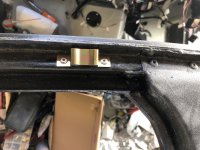
Numerous small parts are being fitted - too many to list really, but here are the upper windscreen surround fitments as an example. I think these will need to be drilled later. so that the stainless steel trim cover can be fixed down.
Body Reinf 12.jpg

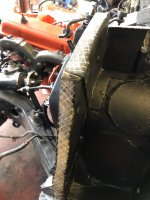
In preparation for the front clip replacement the bonding surfaces have been cross hatched with a Dremel.

Body Reinf 11.jpg

Next week I should be able to fit the steering column and the front clip. It should start looking a bit more like a Corvette again. Fingers crossed.
 
Top