72 Corvette - Restoration Updates

TimP

CCCUK Member
Having received a new speedometer second worm (metal not plastic) on next day post from CK I took a bucketful of beta blockers, a deep breath and after a few tries managed to rejoin the speed cup to the field plate. The tang of the (very delicate) needle return spring has to be threaded through a hole in the casing and glued in place - it needs steady hands and delicate fingers. It's some while since I had either, but persistence wins in the end.:)
Speedo speed cup reassembled.JPG

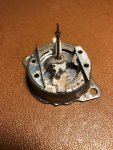
On the main frame the new second worm was installed.
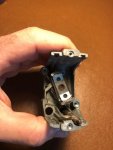
Speedo second worm installed.JPG

And the whole lot then put together - this photo was taken after the number clusters and jewel plate - the 'cross member' on top of the clusters - installed.
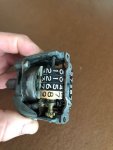
Speedo clusters installed.JPG

The speedo faceplate screws were painted as they were rusty
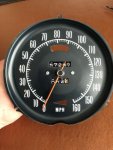
Speedo gauge complete.JPG

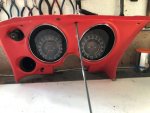
And then installed in the dash.. Front and reverse
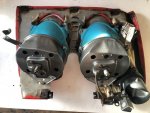
Dash-gauges complete.JPG Dash-gauges complete-front.JPG

The vent was reworked a little to remove some slack from the mechanism and the light switch refitted.
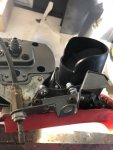
Dash vent mech.JPG

As far as I can tell at this stage everything seems to work fine. I haven't done anything with the dash covering so far and will kick that particular can down the road for a while until I have worked out what to do.

Coincidentally on YouTube 'The CorvetteBen' posted a video this week to do a very similar job. The reverse of his dash (a '75 rather than '72) was similarly rusted and had seized and broken in exactly the same places. His task was to replace the electronic tacho board but much of the work was the same. It's worth a watch if you need to do something similar and all his videos are very interesting and you can a lot from them - I know I have.
 

TimP

CCCUK Member
Now that the gauge panel is as complete as it can be at this stage it's time to move on to something a bit different. This time .... a seat! I would like to be able to have someone sit in the car and steer when it gets moved - not essential but I think it will be useful. In order to do that I will need:

The driver's side floor to be prepared. Largely done but waiting for a warmish day to do some paint
All reinforcement plates repaired or replaced - done
Seat tracks purchased - done (thanks Corvette!)
Seat base repaired - in progress
Seat back restored - in progress
Seat springs and cushions purchased - TBA
Seat covers purchased - done.

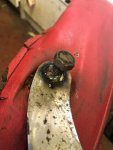
The driver seat back was separated from the base to make it easier the seat easier/lighter to move about and work on. One of the chrome plated recliner bolts was completely seized and the head already mangled so a little effort was required to get it out.
Seat base 0.JPG

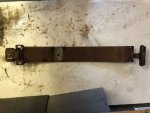
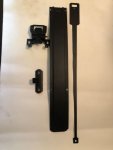
This enabled me to liberate the seat back recliner mechanism for the driver's seat which is remarkably intact but a little corroded. I think these were left unpainted at the factory but as before, in order to protect them for the future I will be painting them to give some level of protection. Here showing the front and back.
Seat back release1.JPG Seat back release2.JPG

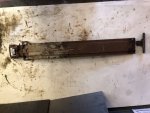
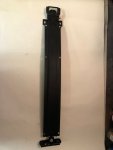
In order to get to the long, thin blade that runs through the casing I drilled out the two rivets at the head end and the large single rivet at the seat base end. Once this was done all pieces had any rust and grime removed and then were primed and painted.
Seat back release3.JPG

New rivets were installed to put it back together again. I greased the blade to make it run smoothly and also help protect the inner of the casing against further rust. I have used a bolt temporarily at the seat base end to keep it all together until I can find a rivet of the right size.
Seat back release4.JPG

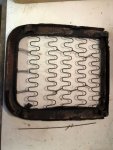
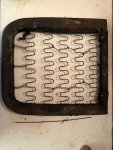
The seat base frame is very corroded and has split at the rear - I understand that this is a common failing and there is even a reinforcement plate you can get to help with this issue. One of the seat back supports that screw into the rear of the seat base snapped off in the frame (joy of joys) and this will have to be removed. There's a fair bit of work to do here - something to look forward to next week ....:)
Seat base 1.JPG Seat base 2.JPG
 

TimP

CCCUK Member
Yes - I already have them having bought them from an eBay seller a year or so ago. They are the same red colour as the originals. I understand that they are a bit tricky to fit.
 

johng

CCCUK Member
Tim, I found the seat bases to reasonably easy to fit but the backs were a bit more difficult (felt like I was in danger of splitting the cover getting it on!). Having said that I'm not sure if your seat backs are the same as mine. I'd suggest you use cable ties to pull the cover into place, it's much easier than using the hog rings. If you want to keep it original you can always go around and fit the hog rings once it's all done and cut the cable ties off again.
 

Corvette

Well-known user
I’ve just recovered a pair of 66 and 67 seats something I had put off doing for two years, I don’t enjoy it. If you haven’t got the hook tool to pull the hooks through the foam just get a thin disc on your angle grinder and cut a groove into a flat screwdriver, worked for me. Hog rings need practice!
 

TimP

CCCUK Member
Thanks for the tips, everyone. I remember meeting a C3 convertible (silver I think) owner at the annual classic car show on the Western Lawns at Eastbourne a few years back who had done a lot of work on his car and he said that the only thing that he wished he'd got someone else to do was the seat covering - so I knew it must be hard!

I'll have a look at the old coverings tomorrow and see how they look.
 

TimP

CCCUK Member
My task for this week was to see what I could do for the seat bases which are heavily corroded and seriously weakened. The right hand side and rear are particularly badly rusted and the rear edge has split. Fewer pies for me then in future.

Being a novice welder I did a lot of research to see how I could fix the corrosion on the base by adding in new metal. 'Fitzees Fabrication' channel on YouTube came up with the answer. Although not Corvette related his tutorials on metalwork and fabrication are excellent and from my novice perspective, highly recommended. I am sure there are others out there that are similar but this is the one I found first and it really helped.

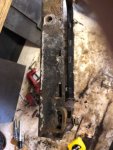
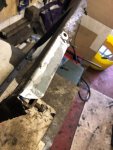
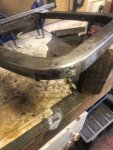
The basic problem is shown below. The lower edge is very wavy rather than straight and considerably thinner than when it left the factory. It's a little difficult to see on the photo but it's pretty rotten.
Seat base 1.JPG

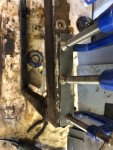
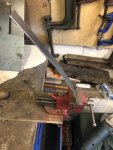
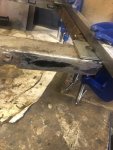
So following the recommended method I clamped on a section of metal of the right thickness and tack welded it to the outside of the corroded strip that needed to be replaced.
Seat base 2.JPG

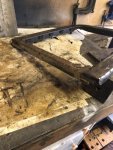
And then trimmed the end with a hand file to give the right curvature. Then cut along the join with a grinding disc.....

Seat base 3.JPG

So that the new strip could be pushed down until it was flush with the old metal still attached the the base, clamped, then welded in place
Seat base 3.JPG

When this stage was complete it looked like this...
Seat base 5.JPG

I then filled the gaps between the tack welds with more metal to get a continuous weld along the join and then ground it down until flush.
Seat base 7.JPG

That seems to look ok and is certainly a lot more rigid than it was before. That leaves the lower edge the other side of the seat back pivot which is a little bit more complicated because it is curved as it goes round the front. You can see in the above photo that the lower edge is very wavy and again this needs to be fixed.

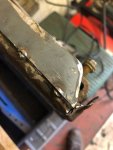
So.... I first cut out the new metal and gave it a bend that matches the seat base....
Seat base 8.JPG

Then clamped it in place and tack welded as before..
Seat base 12.JPG

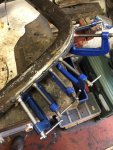
Then cut along the join with a grinding disc, used a clamp to force the new metal to line up with the old metal and then butt welded the new strip in place. The phot here showing the process about three quarters through.

Seat base 15.JPG

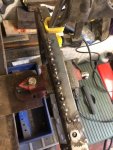
Next step was to fill in the weld gaps as before and when complete grind off the top of the welds until flush. You can see where the new metal was not quite long enough on the front edge (I only had 300 mm square new metal) and so I will put a small section in on the front to give a straight edge, most of the front is in reasonably good shape.
Seat base 16.JPG

There are a couple of places where the weld has not gone all the way through. When I have completed the rear edge and other side (not quite so much to do on that side) I will make good all these areas. The two pivot back rest pivot points will be reinforced with small plates making sure that the backrest brackets still fits correctly across the base. Hopefully I can get this done before the end of the weekend.

I must admit to enjoying learning new techniques like this. For me this is a lot of what my project is about - and it's good fun too.
 

TimP

CCCUK Member
Put it this way: I think the windscreen is holding the frame in place rather than the other way around. A little project all of its own. :)
 

Corvette

Well-known user
You’ve put a lot of time and detail into that seat base when most of use would of welded a strip to the outside or bought another base. Well done. In case your windscreen surround is a sieve, I have the left and right sides of a C3 windscreen frame. I wish I could say the same for a C2.
 
Last edited:

Nick B

CCCUK Member
My task for this week was to see what I could do for the seat bases which are heavily corroded and seriously weakened. The right hand side and rear are particularly badly rusted and the rear edge has split. Fewer pies for me then in future.

Being a novice welder I did a lot of research to see how I could fix the corrosion on the base by adding in new metal. 'Fitzees Fabrication' channel on YouTube came up with the answer. Although not Corvette related his tutorials on metalwork and fabrication are excellent and from my novice perspective, highly recommended. I am sure there are others out there that are similar but this is the one I found first and it really helped.

The basic problem is shown below. The lower edge is very wavy rather than straight and considerably thinner than when it left the factory. It's a little difficult to see on the photo but it's pretty rotten.
View attachment 9232

So following the recommended method I clamped on a section of metal of the right thickness and tack welded it to the outside of the corroded strip that needed to be replaced.
View attachment 9233

And then trimmed the end with a hand file to give the right curvature. Then cut along the join with a grinding disc.....

View attachment 9234

So that the new strip could be pushed down until it was flush with the old metal still attached the the base, clamped, then welded in place
View attachment 9234

When this stage was complete it looked like this...
View attachment 9235

I then filled the gaps between the tack welds with more metal to get a continuous weld along the join and then ground it down until flush.
View attachment 9236

That seems to look ok and is certainly a lot more rigid than it was before. That leaves the lower edge the other side of the seat back pivot which is a little bit more complicated because it is curved as it goes round the front. You can see in the above photo that the lower edge is very wavy and again this needs to be fixed.

So.... I first cut out the new metal and gave it a bend that matches the seat base....
View attachment 9237

Then clamped it in place and tack welded as before..
View attachment 9238

Then cut along the join with a grinding disc, used a clamp to force the new metal to line up with the old metal and then butt welded the new strip in place. The phot here showing the process about three quarters through.

View attachment 9239

Next step was to fill in the weld gaps as before and when complete grind off the top of the welds until flush. You can see where the new metal was not quite long enough on the front edge (I only had 300 mm square new metal) and so I will put a small section in on the front to give a straight edge, most of the front is in reasonably good shape.
View attachment 9240

There are a couple of places where the weld has not gone all the way through. When I have completed the rear edge and other side (not quite so much to do on that side) I will make good all these areas. The two pivot back rest pivot points will be reinforced with small plates making sure that the backrest brackets still fits correctly across the base. Hopefully I can get this done before the end of the weekend.

I must admit to enjoying learning new techniques like this. For me this is a lot of what my project is about - and it's good fun too.
Brilliant post, loads of detail and photos. 👍🏼
 

TimP

CCCUK Member
Glad this has been of interest and thanks for the supportive comments from everyone - appreciated!

You’ve put a lot of time and detail into that seat base when most of use would of welded a strip to the outside or bought another base. Well done. In case your windscreen surround is a sieve, I have the left and right sides of a C3 windscreen frame. I wish I could say the same for a C2.

Yes - I would be interested in those windscreen frame sides - can you post or send me a picture? That would be terrific.
 

Jimbo64

CCCUK Member
First time in ages I've had the time to catch up with this thread, brilliant work, info (and advice from all) Glad my 72 wasn't as bad when I got her, but maybe I haven't "dug as deep!"
 

Corvette

Well-known user
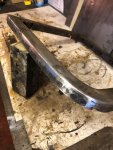
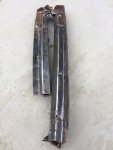
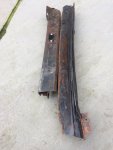
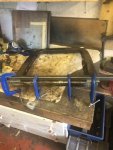
Found them. I’ve run the wire wheel over the front channels were the screen sealant was as its all metal. If your T top frame is also rusty I have a T top body shell for the chop. 7756F205-74E0-4CE5-9677-43C4D5A4E3CB.jpegB49B4ABA-C39A-4E39-8ABB-63E0526A3203.jpeg
 

TimP

CCCUK Member
A little progress on the seat base...

Having braced the frame to remove the bend in the rear section ....
Seat base 17.JPG

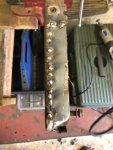
I've been able to complete ... the front...

Seat base 18.JPG

.... rear left hand side ....

Seat base 19.JPG

and rear frame
Seat base 20.JPG

Leaving the small reinforcement plates on each side and the big one along the rear section to do this week. Just noticed from the picture that I haven't removed that broken back rest support bolt in the rear section yet so that needs to be done too. It's interesting that stainless steel bolts (I think these are stainless) don't necessarily behave themselves under wet conditions either. In fact I think this might be more difficult to remove than a mild steel one - it's in an awkward place too. That' probably why I have sub-consciously forgotten it.

Fortunately the back rest is surface rust only so that just needs some wire brushing, preparation and then paint before being put back together.
 
Top